All patients requiring Aerosal Generating Procedures are required to self administer the rapid screening BEFORE appointment.
- Go-live date for faculty and residents: September 8, 2021.
- Go-live date for students: September 13, 2021.
Complete printable COVID-19 Rapid Screening Protocol
Student/Resident Clinical Procedure for Rapid Screening
The QuickVue At-Home OTC COVID-19 Test is intended for the qualitative detection of the nucleocapsid protein antigen from SARS-CoV-2 from individuals with or without symptoms of COVID-19.
The following instructions include the clinical processes for the DCG student, resident and faculty clinics.
Preparation
- Before treatment, patient is asked screening questions/temp taking first as previously
required.
- Results are recorded in AxiUm (EHR -> Medical History -> Vitals).
- Student/resident consults with attending faculty regarding planned procedure and obtains
start check.
- If AGP planned, and isolation is feasible, perform isolation with rubber dam.
- If isolation not possible, faculty will sign a Faculty Attending Authorization Form to obtain screening kit.
- Resident, student or staff member will retrieve a screening kit from dispensary by
presenting the Faculty Attending Authorization Formto dispensary staff.
- Kit from Dispensary will include:
- 1 Sterile swab
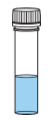
- 1 Plastic tube
- 1 Tube holder
- 1 Test strip
|
(a) |
(b) |
(c)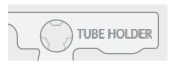 |
(d) |

Testing
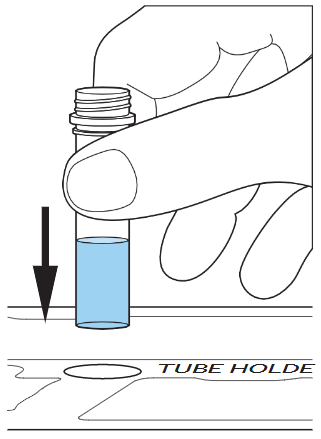
- In exam area, provider will remove cap from PLASTIC TUBE and place it in the TUBE
HOLDER (see diagram to right). NOTE: Use of gloves is required.
- Provider will instruct patient on how to self-administer rapid screening test. Written and video instructionsare available to share with patients.
- Provider provides patient with sealed STERILE SWAB (a).
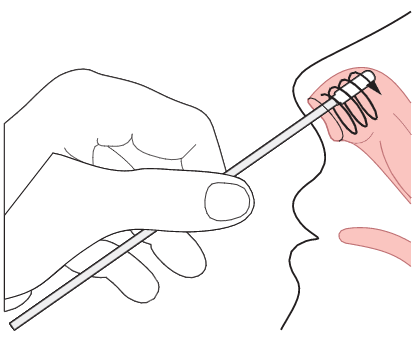 Patient swabs nasal area with direction from student, resident, faculty or staff (see
diagram to right).
Patient swabs nasal area with direction from student, resident, faculty or staff (see
diagram to right).
- Patient gently insert the SWAB ½ to ¾ of an inch into the nostril, depending on the
size of the person’s nose. Patient firmly rubs the SWAB in a circular motion around
the inside wall of EACH NOSTRIL at least 4 times making sure to rub BOTH nostrils
with the SAME SWAB.
- NOTE: If provider is swabbing patient due to unique circumstance, face mask is required.
With children, provider may not need to insert the swab as far into the nostril. For
very young children, provider may need another person to steady the child’s head while
swabbing.
- NOTE: Failure to swab properly may cause inaccurate or invalid results.
- Patient gently insert the SWAB ½ to ¾ of an inch into the nostril, depending on the
size of the person’s nose. Patient firmly rubs the SWAB in a circular motion around
the inside wall of EACH NOSTRIL at least 4 times making sure to rub BOTH nostrils
with the SAME SWAB.
- Provider immediately places the SWAB into the liquid inside the TUBE, and ensures
it is touching the bottom. Stir 3-4 times.
- Leave the swab in the solution for ONE MINUTE.
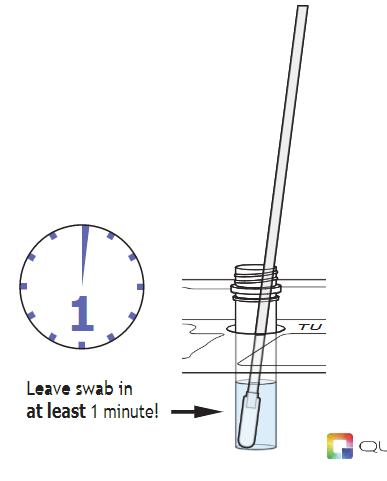
NOTE: If the swab is in the solution for more than 10-minutes it should not be used. - After ONE MINUTE, remove the swab from the TUBE by rubbing the swab head against the
inside wall of the tube to squeeze out as much liquid as possible.
- Dispose of swab in the trash.
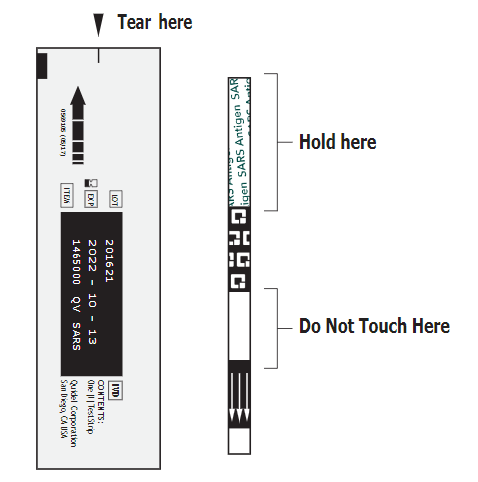
- Open the TEST STRIP pouch carefully at the slit and hold the TEST STRIP as indicated.
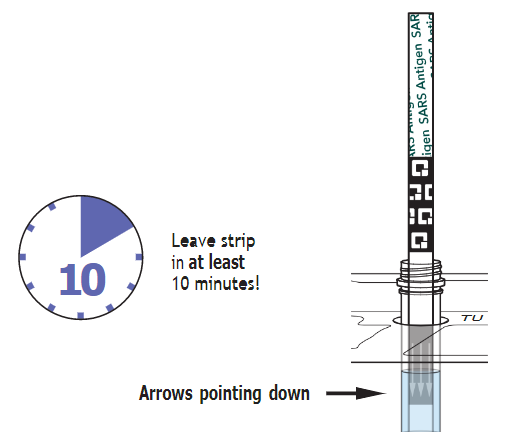
- Place the TEST STRIP into the TUBE with the arrows pointing down. Leave the strip in the TUBE for a FULL TEN MINUTES– do not handle or remove.
- At TEN MINUTES, remove the TEST STRIP from the TUBE and place on the test strip outline
in Steps 10-12. Ensure the TEST STRIP is on a flat surface in good lighting.

NOTE: The test is intended to be read at 10 minutes. If the test is read before this or is read more than 5 minutes after the indicated read time, results may be inaccurate (false negative, false positive,or invalid) and the test should be repeated. - Once test is complete, return the PLASTIC TUBE (b) to the Collection Room along with
all other equipment used during the course of the appointment.
Results
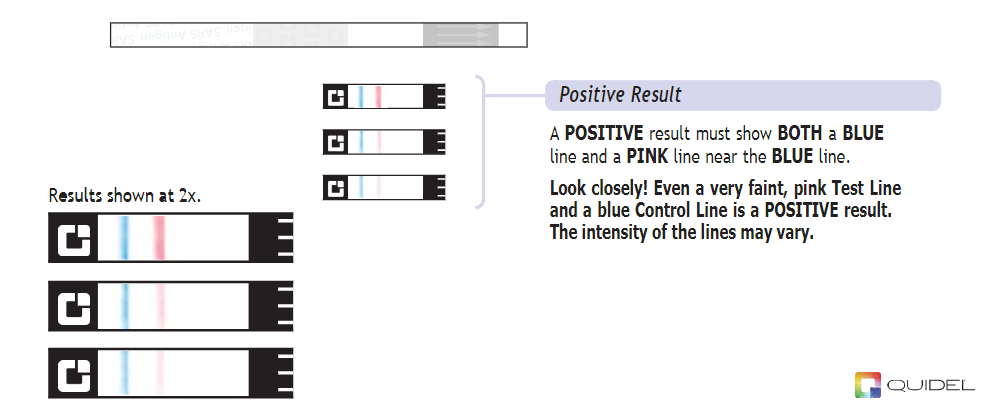
- Positive Result:
Place the TEST STRIP on the test strip outline below and compare with test result examples shown.
Negative Result:
Place the TEST STRIP on the test strip outline below and compare with test result
examples shown.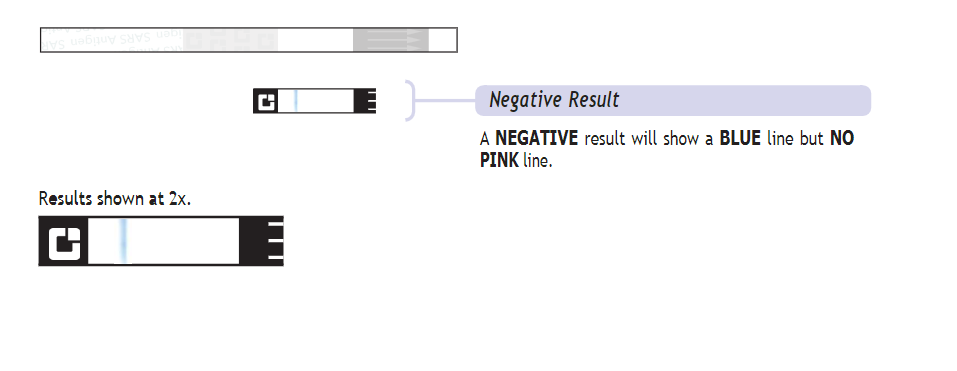
Invalid Result:
Place the TEST STRIP on the test strip outline below and compare with test result
examples shown.
Communicating Results to Patients
- If rapid screening result is negative, use the following communication to explain
to patient before proceeding with procedure.
- A negative test result means that proteins from the virus that causes COVID-19 were
not found in your sample. It is possible for this test to give a negative result that
is incorrect (false negative) in some people with COVID-19. This means that you could
possibly still have COVID-19 even though the test is negative. If you test negative
and begin to experience COVID-19 like symptoms of fever, cough and/or shortness of
breath you should seek follow up care with your healthcare provider. Your healthcare
provider will consider the test result together with all other aspects of your medical
history (such as symptoms, possible exposures, and geographical location of places
you have recently traveled) in deciding how to care for you. For example, your healthcare
provider may suggest you need another test to determine if you have contracted the
virus causing COVID-19. It is important that you work with your health care provider
to help you understand the next steps you should take.
- If rapid screening result is positive, move patient to private consultation room and give instructions about why the AGP procedure will be delayed and about following up with their healthcare provider.
- A positive test result means that proteins from the virus that causes COVID-19 were
found in your sample and it is very likely you have COVID-19. Is important to be under
the care of your healthcare provider. It is also likely that you may be placed in
isolation to avoid spreading the virus to others. There is a very small chance that
this test can give you a positive test result that is wrong (falsepositive.)
Since you have tested positive with the QuickVue At-Home OTC COVID-19 Test you should self-isolate and seek follow-up care with your healthcare provider as additional testing may be necessary. Your healthcare provider will work with you to determine how best to care for you based on your test result along with your medical history, and your symptoms.
- Resident/student records rapid screening results in Axium (EHR -> Medical History
-> Vitals).
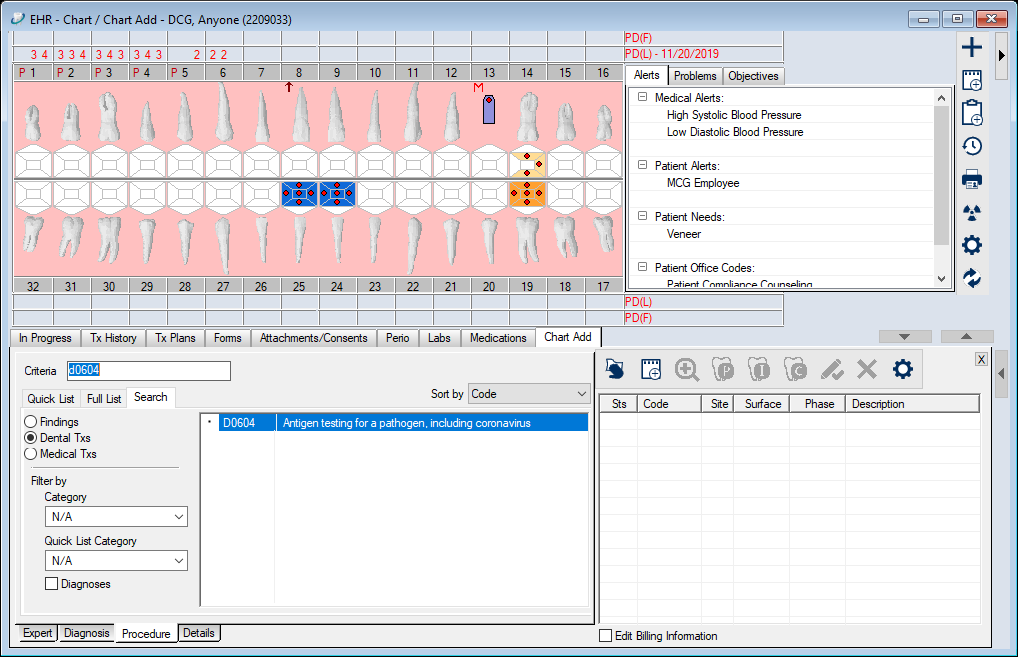
- Additionally, providers will need to record a procedure code and clinical note in
the patient's Tx Historyin order to generate a charge.
- Code to be used: D0604. Patient is not required to sign.
- Suggested notation:
- Negative result: A rapid screening was performed today using the QuickVue self-administered system.
The results of the rapid screening was negative. Patient was informed that this does
not mean that the patient is negative for COVID-19 and if they have symptoms consistent
with COVID-19 they need to see their healthcare provider.
- Positive result: A rapid screening was performed today using the QuickVue self-administered system.
The results of the rapid screening was positive. Patient was informed that this does
not mean that the patient is positive for COVID-19 but were advised to see their healthcare
provider for follow-up. The covering faculty/attending consulted with the patient
to advise them on next steps and that the appointment for today would need to be rescheduled.
- Negative result: A rapid screening was performed today using the QuickVue self-administered system.
The results of the rapid screening was negative. Patient was informed that this does
not mean that the patient is negative for COVID-19 and if they have symptoms consistent
with COVID-19 they need to see their healthcare provider.
- Code to be used: D0604. Patient is not required to sign.
If patient is not prepared to pay for the on-site rapid screening, the charge will
be added to their bill after the appointment.
